Picture this: the carrier clicks shut, tiny paws knead the blanket, and you realize the bowls aren’t washed, the litter isn’t set — panic. That’s exactly when a new kitten checklist printable turns chaos into calm. One page, clear steps, zero guesswork.
When you wing it, you overspend on cute toys and forget the boring stuff that matters — enzyme cleaner, a quiet safe room, the right litter. Miss a vet slot and you wait weeks. Feed the wrong food and hello tummy trouble. Stress climbs; the kitten feels it.
By the end, you’ll have a room-by-room setup plan, a smart shopping list, a first‑week routine, and a vet timeline — all anchored by a new kitten checklist printable you can use today. Ready to set up the essentials and breathe easier?
(Get) Printable New Kitten Checklist: Supplies, Setup, And First-Week Tasks
You don’t need ten apps — you need one clean page that tells you what to buy, how to set up, and what to do on day one. Here’s the thing: a printable checklist cuts decision fatigue fast, so you spend less on impulse buys and focus on essentials that actually prevent messes and stress.
💡 Pro Tip: Print two copies — one for the fridge, one for the carrier pocket — so your first vet visit stays organized even if the morning feels chaotic.
Picture this scenario: you bring home an 11‑week‑old rescue, and within an hour you’ve got a feeding station, litter zone, and a quiet safe room ready. No scrambling — just ticking boxes and breathing again.
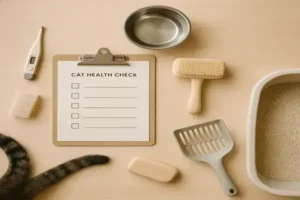
- Stainless steel bowls: easy to sanitize, reduces chin acne.
- Clumping kitten-safe litter: finer texture improves early box success.
- Top‑load carrier: stress‑saving at the clinic check‑in.
- Scratching post + horizontal pad: protects furniture and nails.
- Enzyme cleaner: removes smell to prevent repeat accidents.
- Flea comb + soft brush: daily check for parasites and mats.
Worried about what to track — and how often to update it?
| Section | What to Fill In | Update Frequency |
|---|---|---|
| Shopping List | Sizes, quantities, prices, return dates | Day 0–3 |
| Room Setup Map | Safe room, litter, food/water, hide spots | Once, then tweak as needed |
| Feeding Log | Brand, portion (grams), mealtimes, reactions | Each meal, first 7 days |
| Litter Log | Clumps/poops per day, texture notes | Morning and night |
| Health Tracker | Wellness exam date, vaccines, deworming, microchip | At each appointment |
How to Use and Customize
- Print on sturdy paper and clip to a board; add a pencil on a string.
- Pre‑check your inventory against the list before pickup to avoid last‑minute runs.
- Set a safe room, then follow the map section to place litter 6–8 feet from food.
- Start the feeding log with measured portions; note stool changes and gas — small flags matter.
- Schedule a wellness exam; align your vaccine timeline with American Association of Feline Practitioners guidance.
For health or medication choices, consult a licensed veterinarian. The AAFP and ASPCA offer clear guidance on kitten preventive care, parasite control, and microchip registration — use your health tracker to mirror their timelines.
In practice: I’ve seen owners cut costs by 20% simply by logging what their kitten actually uses (and returning the fifth toy). Pet insurance, flea and tick prevention, and the right carrier become smart, timed purchases — not panic buys. And this is exactly where most people make the most common mistake…
(Do) Prepare Your Home: Safe Room, Litter Zone, Feeding Station
Give your kitten a small world first. One quiet room beats a whole apartment — fewer threats, faster confidence, cleaner habits.
Here’s the thing: placement matters more than pretty gear. If the litter smells like food, or the bed sits by a rattling vent, you’ll see stress and avoidable accidents. Want a calm first week?
💡 Pro Tip: Keep the safe room door closed for 48–72 hours and expand access gradually. The American College of Veterinary Behaviorists notes that controlled exposure lowers fear-based behaviors in newly placed cats.
Safe Room Setup in 6 Steps
Time: 30–45 minutes. Prerequisites: a room with a closing door, easy-to-clean floor, and a spot for vertical perching.
- Washable throw or cave bed for heat and hiding.
- Low-sided litter box with mat or plastic underlay.
- Non-slip placemat for bowls; separate water vessel.
- Vertical perch or stable shelf; towel as grip.
- Soft night light; towel for drafty gaps.
- Pick the room farthest from noise (laundry, TV, HVAC). Close cords and block tight gaps with rolled towels.
- Place the bed in a corner with a wall on two sides — it feels safer and warmer.
- Set the litter box on the opposite side of the room, away from doors and vents, with a mat to trap granules.
- Create the feeding station on tile or a placemat. Keep water separate from food to encourage drinking.
- Add one vertical spot — a sturdy stool or short cat tree — to convert nervous pacing into scanning and resting.
- Plug in a synthetic feline pheromone diffuser if you have one; air the room for 10 minutes daily.
| Area | Placement | Why It Works |
|---|---|---|
| Litter Zone | 6–8 ft from food; not by door | Reduces aversion; prevents startle during entry |
| Feeding Station | On non-slip mat; low traffic | Protects whiskers; steady routine reduces stress |
| Bed/Hide | Corner with warm wall | Security through limited sight lines and warmth |
In practice: a foster I coached kept the box next to the bowls “for convenience.” The kitten skipped meals and soiled the rug. We moved the box 7 feet, added a corner bed, and followed American Association of Feline Practitioners housing guidance — eating improved that night.
What actually works might surprise you…
(Decide) Food, Litter, And Gear: How To Choose What Actually Works
Picking food, litter, and gear shouldn’t feel like a guessing game. What actually works? The truth is, kittens vote with their paws — comfort and smell win every time.
For food, start with an AAFCO “Complete and Balanced” formula for Growth or All Life Stages. That claim means the recipe meets established nutrient profiles — not just clever marketing.
Here’s the thing: kittens need energy-dense meals and brain-building fats. Look for roughly 30–40% protein (dry matter basis), 18–22% fat, and DHA (an omega‑3 that supports neural development). Wet food boosts hydration; a mixed feeding plan often improves appetite and stool quality.
How do you judge brands? The WSAVA Global Nutrition Committee suggests checking if the company employs a board‑certified veterinary nutritionist, does batch testing, and shares calorie data (kcal per 100 g or per can). Those details signal real quality control.
Litter choices matter more than you think — most kittens prefer unscented, fine‑grain clumping clay because it feels like sand. Strong fragrances can repel them, and high dust can irritate tiny airways. Silica gel offers low odor but some kittens dislike the texture; paper pellets are gentle post‑surgery but not as diggable for beginners.
💡 Pro Tip: Transition foods over 7–10 days (25% new, then 50/50, then 75%, then 100%). Do the same with litter by mixing a thin top layer first — sudden changes invite box avoidance and tummy upsets.
Quick Compare: What Works When
| Option | Best For | Watch‑Outs |
|---|---|---|
| Wet (Canned) Kitten Formula | Hydration, picky eaters, portion control | Higher cost per calorie; fridge storage |
| Dry Kitten Kibble | Budget, puzzle feeders, grazing | Lower moisture; measure grams to avoid overfeeding |
| Mixed Feeding | Balanced satiety, flexible calories | Track total kcal; don’t double-feed |
| Unscented Clumping Clay | Fast litter training, easy scooping | Choose low‑dust; avoid perfume |
| Silica Gel Crystals | Odor control, infrequent scoops | Texture aversion in some kittens |
| Stainless Steel Bowls | Hygiene, chin acne prevention | Can clang — add a mat |
| Hard‑Sided Top‑Load Carrier | Clinic exams, safe loading | Bulkier to store at home |
In practice: a new owner used scented litter and a plastic bowl. The kitten skipped the box and developed chin bumps within 48 hours. They switched to unscented clumping clay and stainless steel — box use normalized the same day, and the bumps settled after routine cleaning.
But there’s one detail most owners completely overlook until it’s too late…
(Learn) Vet Visits, Vaccines, And Parasite Prevention: What To Expect
Nervous about the first vet visit? You’re not alone — knowing the timeline turns guesswork into calm. What happens, when, and why it matters.
Here’s the thing: the first 6 months are about three pillars — exams, vaccines, and parasite prevention. Get those right, and most surprises fade fast.
⚠️ Important Warning: Never apply dog-only spot‑ons or permethrin products to cats. The Companion Animal Parasite Council reports serious toxicity from these mistakes — always confirm the active ingredient is cat‑safe.
Visit Timeline and Vaccine Plan
| Age | Visit | What to Expect |
|---|---|---|
| 6–8 weeks | Intake exam | FVRCP #1, fecal test, broad‑spectrum dewormer |
| 9–12 weeks | Booster | FVRCP #2, FeLV test; FeLV #1 if negative |
| 12–16 weeks | Core update | Rabies (per local law), FVRCP #3, FeLV #2 |
| 16–20 weeks | Series finish | Final FVRCP if needed; microchip; prevention check |
| 5–6 months | Pre‑op | Spay/neuter exam, pain‑control plan, dental check |
| 1 year | Annual | FVRCP + Rabies boosters (1‑yr), lifestyle review |
Picture this scenario: you arrive with a 10‑week‑old stray, a fresh stool sample, and a feeding log. The vet confirms weight, gives FVRCP #2, starts flea prevention suited for kittens over 8 weeks, and schedules rabies at 14 weeks — you leave with clear next steps.
Parasites — what’s realistic indoors? Fleas ride in on clothing, and roundworm eggs linger in dust. CAPC recommends stool checks and strategic deworming; many clinics pair monthly preventives that cover fleas plus intestinal worms.
- Topicals: monthly skin application; good for flea control and some mites.
- Orals: palatable tablets; options cover fleas and, with add‑ons, round/hookworms.
- Heartworm: lower risk in cats, but severe when it occurs — your region and AVMA guidance drive the decision.
Worth noting: the American Association of Feline Practitioners outlines core vaccines (FVRCP, Rabies) for all cats, and FeLV for kittens or at‑risk lifestyles. Missed a booster window? Your vet may restart parts of the series to protect immunity.
In practice: a client skipped the 3–4‑week booster gap, thinking “one shot is plenty.” Their kitten needed an extra visit to rebuild coverage — a small delay that cost more time than the calendar reminder would’ve.
And this is exactly where most people make the most common mistake…
(Do) First 48 Hours And Week One Routine: Schedule, Socialization, Red Flags
The first 48 hours set the tone. Keep it simple — predictable meals, quiet rest, and tiny wins that build trust fast.
Here’s the thing: routine beats enthusiasm. Small, frequent meals, a clean box, and short play‑then‑settle windows calm nerves and stop night chaos before it starts. Wondering what that looks like hour by hour?
💡 Pro Tip: Use a phone timer for “meal, play, litter, rest” cycles. Stack habits the same way each time — kittens learn the pattern, not the speech.
First 48 Hours Schedule
| When | Action | Why It Matters |
|---|---|---|
| Arrival (T+0) | Release in safe room; show water and litter | Reduces scanning; anchors two key resources |
| T+30–60 min | Small wet meal; lights low | Gentle calories support hydration and digestion |
| Every 4–6 hr | Feed, then 5–10 min play, then rest | Predictable cycle prevents sugar crashes and zoomies |
| 9:00 PM | Evening meal; scoop box; dim light | Clean cue before bed reduces overnight accidents |
| 7:00 AM (Day 2) | Weigh on digital scale; morning meal | Daily grams flag trends before appetite dips |
| Days 2–7 | 3–4 calm social sessions; 1 new sound/surface | Micro-exposures build confidence without flooding |
Socialization isn’t party time — it’s gentle, paired experiences. International Cat Care notes the socialization window is early; keep sessions short, add a food lure, and stop while curiosity is still rising.
Red flags to watch this week: skipping two consecutive meals, repeated vomiting, watery diarrhea, deep lethargy, labored breathing, or pale gums. The American Veterinary Medical Association highlights dehydration and respiratory signs as urgent — log changes with times and context.
In practice: a foster placed the carrier as a “bedroom,” dimmed lights, and ran a pheromone diffuser. With the meal‑play‑litter‑rest cadence and a quick morning weigh‑in, the kitten slept six straight hours — and a soft stool on Day 3 was caught early because the log showed a dip in food.
But there’s one detail most owners completely overlook until it’s too late…
Here’s your snapshot: set up a calm safe room with clear zones, pick kitten‑friendly food, litter, and gear, and follow a simple health timeline. If you take just one thing from this guide, let it be: use a new kitten checklist printable to turn chaos into a steady, repeatable routine.
Before, everything felt random — rushed store runs, messy boxes, missed steps. Now you’ve got structure. Small meals, short play, clean litter, and quiet rest. You’ll track what matters and spot issues early. It’s not fancy. It’s consistent. And that’s exactly how confidence builds for both of you.
Which step are you setting up first — the safe room, the litter zone, or the first‑week schedule? Tell us in the comments!

About the Author: Morgan Ellis is a pet care enthusiast dedicated to helping everyday owners build confident, organized routines for their dogs and cats. With a passion for practical, vet-informed guidance, Morgan helps pet parents navigate the joys and challenges of pet ownership with clarity and ease.